


Overview
Python is one of the most versatile programming languages, with applications ranging from researchers running test models to developers working in high-volume production environments. In today's guide, we'll look at Brownie, a Python-based tool for creating and deploying smart contracts.
Prerequisites
Python3 installed
Ethereum node
Text editor
Command-line
Love for brownies
What exactly is Brownie?
JavaScript-based libraries such as web3.js, ethers.js, Truffle, and Hardhat dominate smart contract development. Python is a versatile and widely used programming language that can also be used for smart contract/web3 development; web3.py is a compelling Python library that meets web3 requirements. The Brownie framework is built on web3.py.
Brownies are small rectangular confectionary items that everyone enjoys, but the Brownie we're discussing today is a Python-based framework for developing and testing smart contracts. Brownie supports both Solidity and Vyper contracts, as well as contract testing via pytest.
To demonstrate the process of writing and deploying a smart contract with Brownie, we will use Brownie-mixes which are template projects. Specifically, we will use a token mix, which is a template of the ERC-20 implementation.
Installing dependencies
Brownie is built on top of python3, so we need it installed to work with brownie; let us check if we have python3 installed on our system. To do so, type the following in your terminal/cmd:
python3 -V
This should return the version of python3 installed. If not installed, download and install it from the official python website.
Let us make a project directory before installing brownie, and make that project directory our current working directory:
mkdir brownieDemo
cd brownieDemo
Now that you have installed python3 on your system let us install brownie using pip, Python's package manager. Pip is similar to what npm is for JavaScript. Type the following in your terminal/cmd:
pip3 install eth-brownie
## If the install failS, use the following command for better luck.
sudo pip3 install eth-brownie
To check if Brownie was installed correctly, type brownie in your terminal/cmd, and it should give the following output:

To get the token mix, type the following in your terminal/cmd:
brownie bake token
This will create a new directory token/ in our brownieDemo directory.
File Structure
First of all, lets cd into the token directory:
cd token
Now, open the token directory in your text editor. Under the contracts/ folder, you will find Token.sol, which is our main contract; you can write your own contracts or modify this. Under the scripts/ folder, you will find token.py python script; this script will be used to deploy the contract, and modifications are needed based on contracts.

The contract is an ERC-20 contract; you can learn more about the ERC-20 standards and contracts in this guide on ERC-20 tokens.
Booting our Ethereum node
We will deploy our contract on the Ropsten testnet instead of running our own node. It is more convenient to get a free trial endpoint from QuickNode. Make sure to select Ethereum as the chain and Ropsten as the network during checkout.
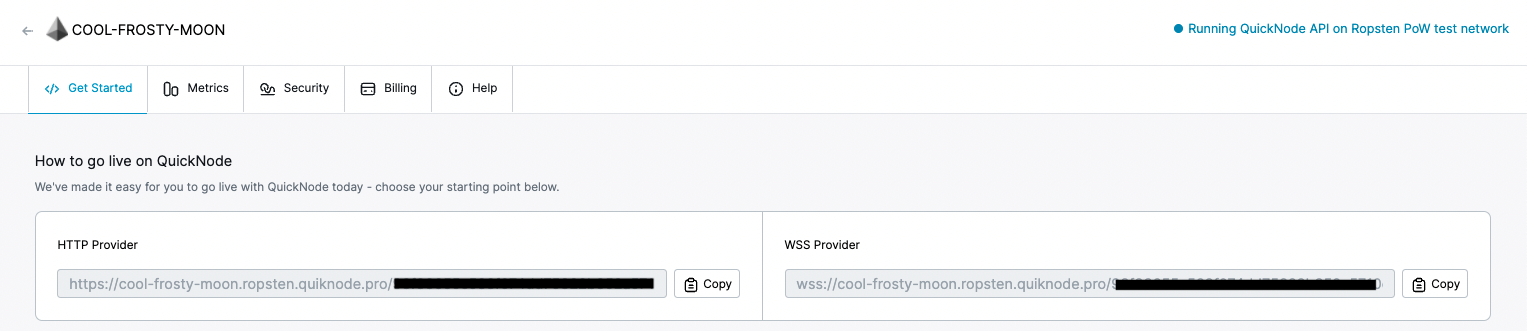
Save the HTTP URL. We will need it in the next step.
Network and Account Set Up.
We need to set up our QuickNode endpoint with Brownie. To do so, type the following in your terminal/cmd:
brownie networks add Ethereum ropstenquicknode host=YOUR_QUICKNODE_URL chainid=3
Replace YOUR_QUICKNODE_URL with the Ropsten URL we got in the last step.
In the above command, Ethereum is the name of the environment, and ropstenquicknode is the custom name of the network; you can give any name to your custom network.
The next thing we need to do here is to create a new wallet using Brownie. To do so, type the following in your terminal/cmd. You will be asked to set up a password for your account.
brownie accounts generate testac
This will generate an account along with a mnemonic phrase and save it offline. The name testac is the name for our account. You can choose any name that you would like.

Note: Mnemonic phrases can be used to recover an account or import the account to other non-custodial wallets. The account you see in the image above was just created for this guide.
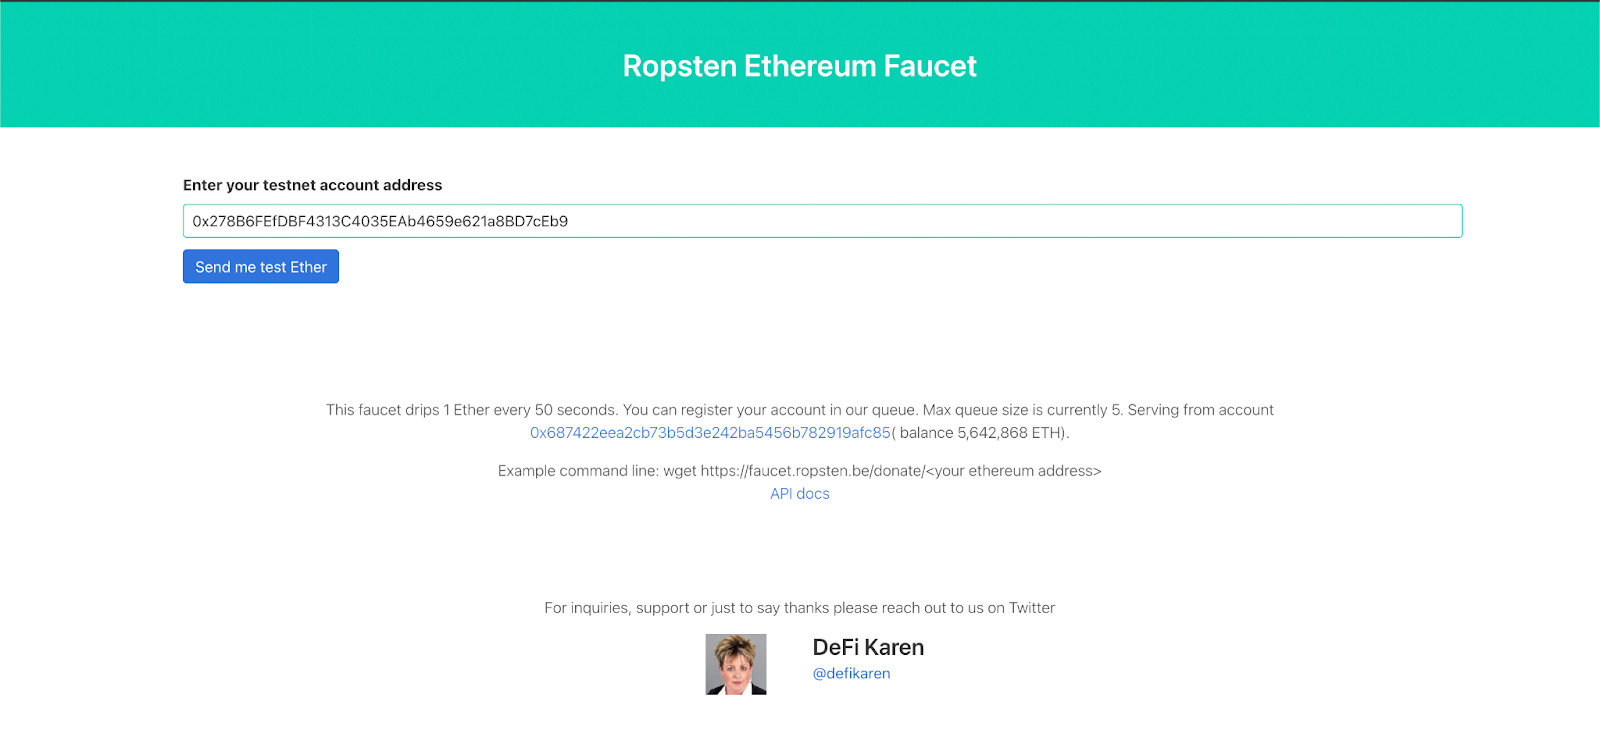
Copy the account address so that we can get some test ETH, which will be required to deploy our contract.
Getting test ETH
As our contract will be deployed on the Ropsten testnet, we will require some Ropsten test ETH to pay for the gas fee. Head over to the Ropsten faucet, paste your address in the field, and click on "Send me test Ether".
Deploying our contract
Before deploying the contract, we need to compile it using:
brownie compile

Now open the scripts/**token.py** in your text editor, and make the following changes:
#!/usr/bin/3

from brownie import Token, accounts

def main():
    acct = accounts.load('testac')
    return Token.deploy("Test Token", "TST", 18, 1e21, {'from': acct})
Line 6: We added this line to import the testac account we created earlier and stored it in the acct variable.
Line 7: On this line, we edited the 'From': part to have our acct variable.
FINALLY, we will deploy our contract using the deployment script (scripts/token.py here):
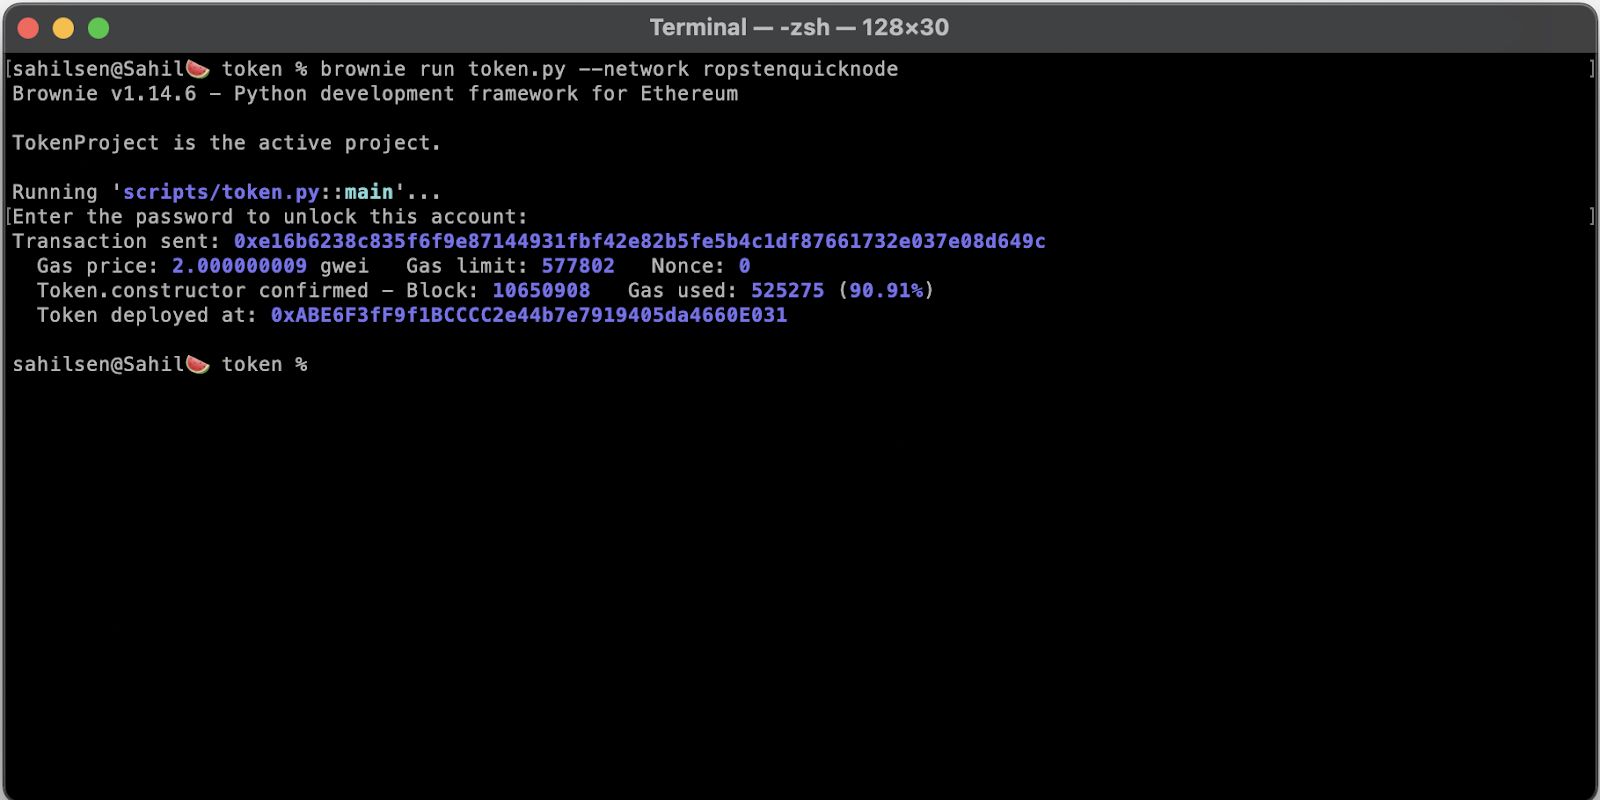
brownie run token.py --network ropstenquicknode
In the above command, ropstenquicknode is the name of the custom network which we created earlier. The prompt will ask you for the password which we set earlier while making the account. After running the above command, you must get the transaction hash, and Brownie will wait for the transaction to get confirmed. Once the transaction is confirmed, it will return the address at which our contract is deployed on the Ropsten testnet.
Conclusion
So, today we learned brownies are good, but Brownie the framework is the best. We learned how to import a Brownie-mix, add a custom network, create an account, and compile and deploy a contract, and we used Brownie for the entire process!